

? | Home page | Tutorial | Recording


Before anything else, we need to prepare the recording session. We are not going to look for a melody, nor improvise or rehearse... we are going to properly record a song that we have already written. To avoid doing the same things over again each time I wish to record a song, I prepared a blank template which contains all the tracks and buses I need. I may naturally add or delete some elements if the template is not appropriate for the current project.
What does my template look like?
Track-wise:
- Rhythm guitar tracks (from 2 to 8 depending on the project)
- Solo guitar tracks (usually 2 tracks to make the sound thicker)
- Two bass tracks (one with the direct raw sound, and one with an amp simulation)
- Lead vocal tracks (usually one or two tracks, depends if I record it twice or not)
- Background vocals tracks (if the project demands it)
- Keyboard tracks (same thing, the number of virtual instruments will depend on the project, can be none, can be 5 or 6...)
Then we have drum tracks. There is one track per drum element. They are automatically created when I insert my virtual drum plugin:
- Kick drum
- Snare drum
- Low tom
- Medium tom
- High tom
- Hi-hat
- Crash cymbal
- Ride cymbal
- Splash cymbal
- Overhead microphone
- Room Ambiance microphone
- Piezzo microphone
- One MIDI track on which the drum score will be placed.
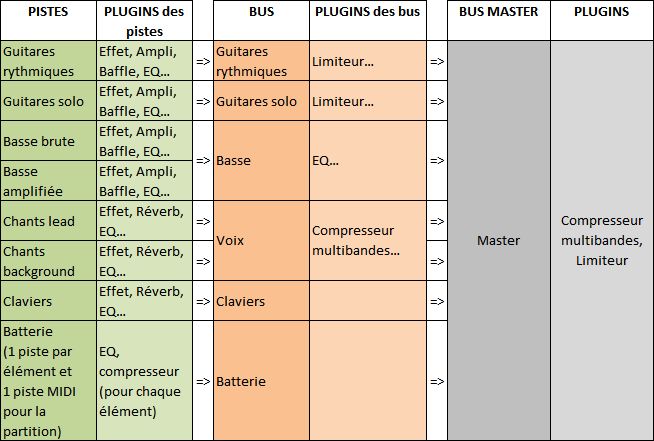
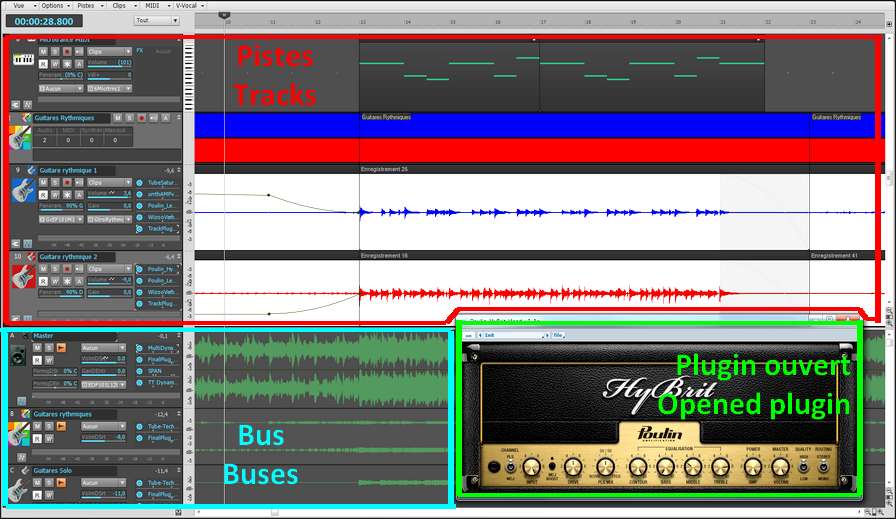
Bus-wise, I have one group for the guitars, one for the bass, one for the vocals, one for the drums, each of them is redirected towards the Master bus, which goes out throuh my studio monitors. It looks like this:





Recording an acoustic real drum kit is far from being easy, even for professional sound engineers. It a time-consuming process, it's frequent to spend several hours placing the microphones around the drum elements before you can actually record. But we are in a home studio, and we will have to deal with a software drum kit, based on midi files...
First of all, why start with the drums? The answer is simple, we will use drums as a metronome. The drums sound will guide us and help us follow the tempo. This will allow for an even recording and the song will not speed up or slow down unintentionally. Of course, variations can be interesting and bring some life to an otherwise mechanical tempo, but let's consider that a studio session seeks recording perfection, even though it's only a home studio.
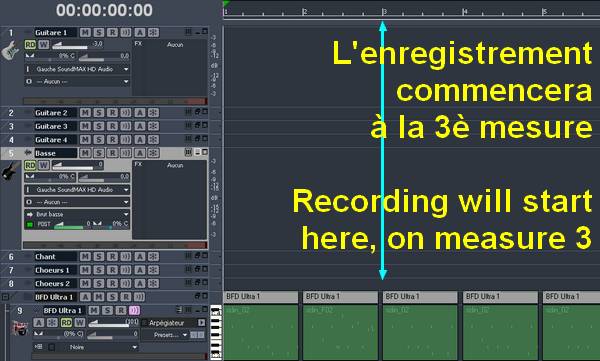
I usually have no idea what my final drum track will sound like. Actually, I only adjust it when the rest of the song is finished. But I still need its metronome function to record all other instruments. Thus, I create a drum track which repeats itself over and over again, and I try to have this loop match what I am about to play (no punk rhythm to record a ballad). For instance, I'll use one of these patterns:

Let's not forget we are recording in a home studio, in an appartment and it is simply impossible to play with a good old 100-watt tube amplifier, without the neigbors calling the police. So we are going to have to record the guitars and the bass directly through the audio interface. No real amplifier, no microphones involved. The latter solution would be preferable, but on of the benefits of direct recording, coupled with amplifier simulators, is that you can always edit the sound later, without having to re-record. Just change the settings and you're done.
So now... bass or guitars first? There isn't one clear answer. Bass and drums are the foundation, the rhythm base of a song and everything else should rely on them. But other factors could also be taken into consideration: for instance, the person recording may be more comfortable with a guitar than a bass, and will rather play guitar first. Or maybe the song has a very important bass riff that compels you to record it first. In any case, you are the one who can decide. If you are uncertain, then the drum / bass duo is a safe bet. If this is in place, then the rest can easily be added.
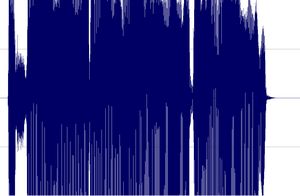
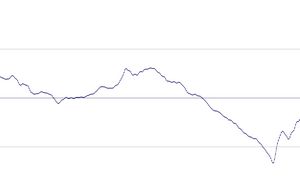
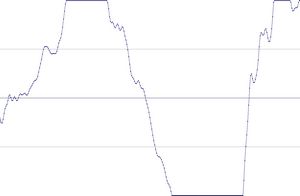
Guitar or bass, the recording process will be the same. Plug your guitar into the pre-amp, the pre-amp is connected to the audio interface (or plug your guitar directly into the audio interface if using the interface's pre-amp), and set the recording level. This is very important! Before recording anything, check that you are not going to go beyond the maximum level (0 dB, zero decibel). In a home studio, you won't have a sound engineer besides you to make adjustments on the fly, while you are playing. You are the one to take precautions. How can you do that? Simple: try and adjust, it doesn't take long and will prevent you from making a perfect take, then realize the levels were too low or too high, forcing you to do it all over again.
Have a try: for a rhythm guitar for example, play the loudest parts and set the preamp and audio interface volume levels in such way that when you play the loudest, the recording level doesn't go beyond -6 dB. The absolute maximum that you should not reach or go beyond is zero dB. If you play in your try the same way you play during the actual recording, then you can be certain the recording level will be correct. If your average level is between -9 db and -6 dB, then your level is sufficient and you have a margin of error before clipping.
Clipping is the term used to indicate that you reach or go beyond 0 dB. Clipping is your enemy :-)

I prefer to record them last but there are no rules. If you prefer to record them first, then do so.
To record vocals, make sure the place is quiet, shut the door, tell the people who live with you to be quiet, and do not record while your neighbor is drilling holes through his kitchen walls! Also, turn off your monitors and use a headset instead to avoid recording the playback with your microphone.
Condenser or dynamic microphones?
Dynamic microphones are solid, they don' need a power source, they can take heavy acoustic pressure (like a kick drum or a saxophone) and they are not too expensive. They are also less sensitive to surrounding noises than condenser microphones. The cons are they lack clarity in the high range, which renders takes less clear and defined than with condenser microphones. They can be used with Jack or XLR plugs.
Condenser microphones are much more responsive and accurate. Their high sensitivity is double-edged, because they will capture any noise when recording. The fans of your PC are noisy? Chances are this noise will be recorded. Sound comes out of your headset? It will be recorded by your condenser microphone. Children are loudly playing outside? You might get that too. However, some condenser microphones are called "cardioid", or "hyper cardioid", and they only record what comes from a specific direction, ignoring (more or less) other sound sources from other directions. On the contrary, omnidirectional microphones record what comes from anywhere. Not ideal for a home studio. Condenser microphones are also more fragile (don't knock them) and must be powered through a "phantom power", whose standard is 48 volts. This kind of power is either present on your audio interface and can be turned on and off with a button, or it will require the use of an external phantom power source that you will then connect to your audio interface. You have to use 3-pin XLR plugs that carry the phantom power current. Finally, condenser microphones are usually rather expensive, some of them cost several thousand euros (or dollars, or pounds), but only professional studios or rich amateurs can afford those. On the plus side, the sound you get with a condenser microphone will have the best quality.
Be cautious though, a good dynamic microphone is worth better than a bad condenser microphone. No big secret here, for microphones like for anything else, very low prices are rarely synonymous with good quality.
A few known and renowned microphone brands: AKG, Milab, Neumann, Rode, Sennheiser, Shure...
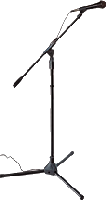
Some pieces of advice: buy a microphone stand and a pop filter (you can also make one yourself with wire and a piece of tights from your wife / girlfriend / mother / daughter / neighbor). The stand will prevent you from manually holding your microphone and thus produce handling noises. As for the pop filter, it prevents the air to hit the microphone and produce unwanted blowing sounds when you pronounce some letters such as "p" or "b".
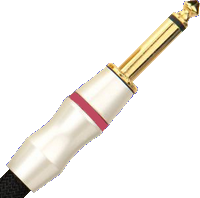
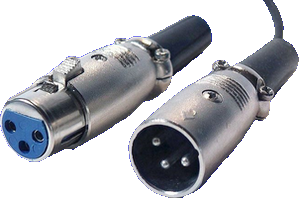
Jack plug (left) and XLR (right)


No need to go on and on forever, recording is rather easy. As long as you pay attention to your recording levels and take care over your takes, you should get a satisfying result, good enough to finalize the song

Messages page # 1 2 3 4 5 6 7 8 9 10 11 12 13 14 15 16 17 18 19 20 21 22 23 24 25 26 27 28 29 30 31 32 33 34 35

mikeviet
le 06/01/2013 à 04h09
Déjà un grand Bravo pour le site !! C`est vrai !!
Maintenant juste une question : y a-t-il un simulateur gratuit pour guitare électro-acoustique ou pas ?
Merci.
* * * * * * * * * * * * * * * *
<em>Merci d’être passé sur mon site !
Concernant votre question sur le simulateur pour guitare électro-acoustique, je ne suis pas sûr de comprendre précisément la question. Est-ce que vous cherchez un simulateur de guitare ou un simulateur d’ampli pour guitare électro-acoustique ?
Dans le premier cas, il s’agirait d’un VSTi (un plugin d’instrument virtuel) reproduisant le son d’une guitare électro-acoustique.
Dans le deuxième cas, il s’agit d’un VST, un simulateur d’ampli en l’occurrence.
Je pense que vous voulez plutôt parler d’un simulateur d’ampli. À ma connaissance, il n’y a pas de simulateur (gratuit tout du moins) spécifiquement conçu pour les électro-acoustiques. Mais il est tout à fait possible d’utiliser des simulateurs d’ampli pour guitare électrique, en prenant de soin de faire des réglages qui évitent toute distorsion.
Prenez par exemple le simulateur NRR1 d’Ignite Amps, choisissez le canal clair (clean) avec un gain très réduit, un niveau d’entrée faible également (2è écran du simulateur, bouton "level input") et cela permettra d’avoir un son qui reste clair, sans aucune saturation.
Ensuite, il faut évidemment ajouter un chargeur d’impulsion, en choisissant une impulsion de baffle adéquate. La plupart des impulsions disponibles sont des impulsions provenant de baffles pour guitare électrique, mais en utilisant des impulsions de baffles Fender ou Vox, on reste sur des baffles capables de bien rendre les sons clairs. Sur ma page d’impulsions (chapitre des impulsions personnelles), je propose des impulsions que j’ai faites moi-même à partir d’un ampli pour guitare électro-acoustique Peavey Ecoustic 110 EFX. Ça marche évidemment très bien avec une guitare électro-acoustique.
Grebz</em>
* * * * * * * * * * * * * * * *
Merci pour ta réponse !!! Je vais essayer Peavey Ecoustic 110 EFX... Un grand merci !

Masteringaddict
le 06/11/2012 à 15h04
Excellent site ! Plein de bons conseils. Je plussoie ceux sur le niveau d'écoute et sur le temps passé sans pause. Si vous ne voulez pas devenir sourd trop tôt, pensez à les imprimer et à les afficher dans votre studio !
J'y rajouterais pour information les conseils sur l'acoustique du lieu de mixage et de mastering, le positionnement des enceintes, les dangers de la compression,etc...
Pour en savoir plus, j'affiche de nombreuses infos sur mon site <a href="http://mastering-addict.com" target="_blank">Mastering Addict</a>.

Christophe
le 03/10/2012 à 19h53
Merci pour ton site, on apprend toujours et encore.
Le lien de mon groupe :
<a href="http://www.lessexesfaibles.fr/" target="_blank">Les Sexes Faibles</a>
* * * * * * * * * * * * * * * *
<em>Très sympa tes chansons !
Grebz</em>

koansinger
le 28/09/2012 à 23h36
Merci pour ce site très riche et complet.
J'ai fait une formation courte de technicien polyvalent du spectacle vivant et nous n'avons fait que survoler l'aspect MAO du métier.
Cependant grâce à vous, j'approfondis nettement mes connaissances dans le domaine, ce qui devient nécessaire lorsqu'on veut enregistrer une pré-prod en solo avec son groupe ;)
Est-il envisageable de vous envoyer mon "produit" fini afin de recueillir vos impressions ?
Merci encore et bravo à vous !
* * * * * * * * * * * * * * * *
<em>Merci de votre appréciation !
Vous pouvez bien sûr m'envoyer votre œuvre pour que j'y jette une oreille attentive, mais je ne suis qu'un amateur passionné qui cherche à partager ses connaissances.
Mon avis aura l'avantage d'être un avis extérieur, avec un œil nouveau sur votre travail, mais ce ne sera pas celui d'un ingénieur du son professionnel.
Grebz</em>

Captain Niglo
le 26/09/2012 à 21h05
Vraiment bien ton site !
Grâce à toi je suis maintenant un pro de la simulation d'ampli :o)
Tu me conseillerais quoi comme plugin pour avoir un son plutôt Jazz ?
* * * * * * * * * * * * * * * *
<em>Je ne pense pas qu'un son typé Jazz s'obtienne avec des plugins particuliers. Je ne m'y connais pas en Jazz, mais je pense que ça se joue à la prise de son (pour ceux qui enregistrent en "vrai", sans simulateurs), dans le choix des instruments, et dans les réglages des plugins (EQ et compression notamment). Qu'on joue du Metal, du Blues, du Jazz ou du Rock (je reste dans le domaine des musiques à base de guitares et basses), un EQ reste un EQ, un compresseur reste un compresseur.
Le son Jazz est sans aucun doute plus "brut" que celui du Metal, la gamme des effets appliqués est plus restreinte. Après, ça dépend aussi de quel catégorie de Jazz on parle. Entre le Jazz New Orleans, l'Acid Jazz, le Free Jazz ou le Jazz Manouche, il y a un monde.
Pour retrouver le son du Jazz que tu aimes, je te conseille de te baser sur une musique de référence que tu aimes beaucoup, et dont tu aimerais te rapprocher et tenter de reproduire, instrument par instrument, les réglages qui te permettront d'atteindre ton but. Ce ne sera peut-être pas évident, tu vas peut-être faire beaucoup d'essais/erreurs, mais ce sera très formateur dans ton apprentissage des outils.
Grebz</em>
