

? | Home page | Tutorial | Recording


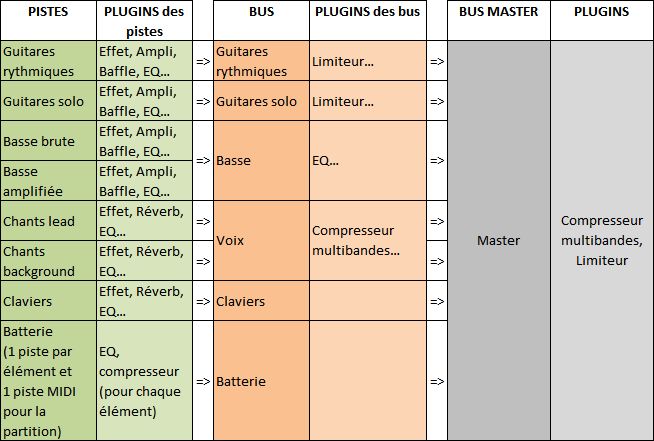
Before anything else, we need to prepare the recording session. We are not going to look for a melody, nor improvise or rehearse... we are going to properly record a song that we have already written. To avoid doing the same things over again each time I wish to record a song, I prepared a blank template which contains all the tracks and buses I need. I may naturally add or delete some elements if the template is not appropriate for the current project.
What does my template look like?
Track-wise:
- Rhythm guitar tracks (from 2 to 8 depending on the project)
- Solo guitar tracks (usually 2 tracks to make the sound thicker)
- Two bass tracks (one with the direct raw sound, and one with an amp simulation)
- Lead vocal tracks (usually one or two tracks, depends if I record it twice or not)
- Background vocals tracks (if the project demands it)
- Keyboard tracks (same thing, the number of virtual instruments will depend on the project, can be none, can be 5 or 6...)
Then we have drum tracks. There is one track per drum element. They are automatically created when I insert my virtual drum plugin:
- Kick drum
- Snare drum
- Low tom
- Medium tom
- High tom
- Hi-hat
- Crash cymbal
- Ride cymbal
- Splash cymbal
- Overhead microphone
- Room Ambiance microphone
- Piezzo microphone
- One MIDI track on which the drum score will be placed.
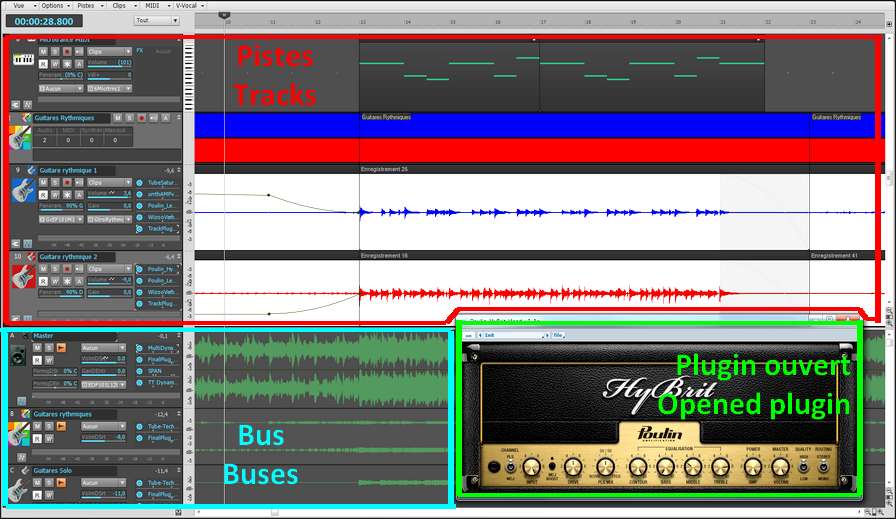
Bus-wise, I have one group for the guitars, one for the bass, one for the vocals, one for the drums, each of them is redirected towards the Master bus, which goes out throuh my studio monitors. It looks like this:





Recording an acoustic real drum kit is far from being easy, even for professional sound engineers. It a time-consuming process, it's frequent to spend several hours placing the microphones around the drum elements before you can actually record. But we are in a home studio, and we will have to deal with a software drum kit, based on midi files...
First of all, why start with the drums? The answer is simple, we will use drums as a metronome. The drums sound will guide us and help us follow the tempo. This will allow for an even recording and the song will not speed up or slow down unintentionally. Of course, variations can be interesting and bring some life to an otherwise mechanical tempo, but let's consider that a studio session seeks recording perfection, even though it's only a home studio.
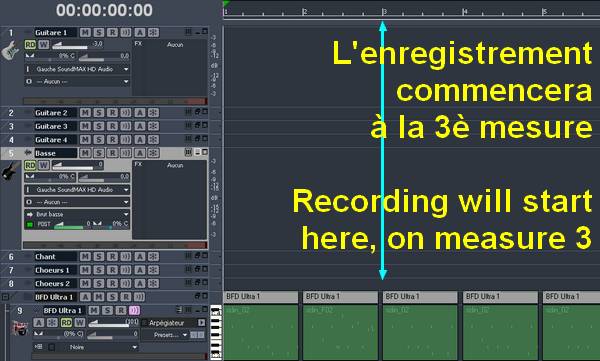
I usually have no idea what my final drum track will sound like. Actually, I only adjust it when the rest of the song is finished. But I still need its metronome function to record all other instruments. Thus, I create a drum track which repeats itself over and over again, and I try to have this loop match what I am about to play (no punk rhythm to record a ballad). For instance, I'll use one of these patterns:

Let's not forget we are recording in a home studio, in an appartment and it is simply impossible to play with a good old 100-watt tube amplifier, without the neigbors calling the police. So we are going to have to record the guitars and the bass directly through the audio interface. No real amplifier, no microphones involved. The latter solution would be preferable, but on of the benefits of direct recording, coupled with amplifier simulators, is that you can always edit the sound later, without having to re-record. Just change the settings and you're done.
So now... bass or guitars first? There isn't one clear answer. Bass and drums are the foundation, the rhythm base of a song and everything else should rely on them. But other factors could also be taken into consideration: for instance, the person recording may be more comfortable with a guitar than a bass, and will rather play guitar first. Or maybe the song has a very important bass riff that compels you to record it first. In any case, you are the one who can decide. If you are uncertain, then the drum / bass duo is a safe bet. If this is in place, then the rest can easily be added.
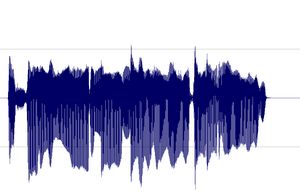
Guitar or bass, the recording process will be the same. Plug your guitar into the pre-amp, the pre-amp is connected to the audio interface (or plug your guitar directly into the audio interface if using the interface's pre-amp), and set the recording level. This is very important! Before recording anything, check that you are not going to go beyond the maximum level (0 dB, zero decibel). In a home studio, you won't have a sound engineer besides you to make adjustments on the fly, while you are playing. You are the one to take precautions. How can you do that? Simple: try and adjust, it doesn't take long and will prevent you from making a perfect take, then realize the levels were too low or too high, forcing you to do it all over again.
Have a try: for a rhythm guitar for example, play the loudest parts and set the preamp and audio interface volume levels in such way that when you play the loudest, the recording level doesn't go beyond -6 dB. The absolute maximum that you should not reach or go beyond is zero dB. If you play in your try the same way you play during the actual recording, then you can be certain the recording level will be correct. If your average level is between -9 db and -6 dB, then your level is sufficient and you have a margin of error before clipping.
Clipping is the term used to indicate that you reach or go beyond 0 dB. Clipping is your enemy :-)
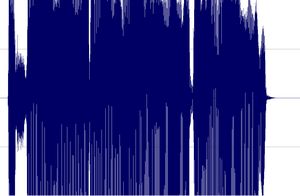
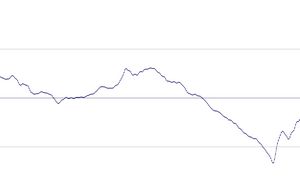
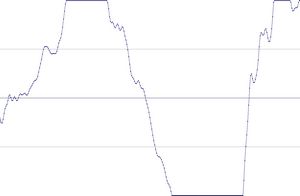

I prefer to record them last but there are no rules. If you prefer to record them first, then do so.
To record vocals, make sure the place is quiet, shut the door, tell the people who live with you to be quiet, and do not record while your neighbor is drilling holes through his kitchen walls! Also, turn off your monitors and use a headset instead to avoid recording the playback with your microphone.
Condenser or dynamic microphones?
Dynamic microphones are solid, they don' need a power source, they can take heavy acoustic pressure (like a kick drum or a saxophone) and they are not too expensive. They are also less sensitive to surrounding noises than condenser microphones. The cons are they lack clarity in the high range, which renders takes less clear and defined than with condenser microphones. They can be used with Jack or XLR plugs.
Condenser microphones are much more responsive and accurate. Their high sensitivity is double-edged, because they will capture any noise when recording. The fans of your PC are noisy? Chances are this noise will be recorded. Sound comes out of your headset? It will be recorded by your condenser microphone. Children are loudly playing outside? You might get that too. However, some condenser microphones are called "cardioid", or "hyper cardioid", and they only record what comes from a specific direction, ignoring (more or less) other sound sources from other directions. On the contrary, omnidirectional microphones record what comes from anywhere. Not ideal for a home studio. Condenser microphones are also more fragile (don't knock them) and must be powered through a "phantom power", whose standard is 48 volts. This kind of power is either present on your audio interface and can be turned on and off with a button, or it will require the use of an external phantom power source that you will then connect to your audio interface. You have to use 3-pin XLR plugs that carry the phantom power current. Finally, condenser microphones are usually rather expensive, some of them cost several thousand euros (or dollars, or pounds), but only professional studios or rich amateurs can afford those. On the plus side, the sound you get with a condenser microphone will have the best quality.
Be cautious though, a good dynamic microphone is worth better than a bad condenser microphone. No big secret here, for microphones like for anything else, very low prices are rarely synonymous with good quality.
A few known and renowned microphone brands: AKG, Milab, Neumann, Rode, Sennheiser, Shure...
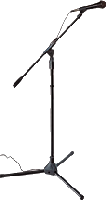
Some pieces of advice: buy a microphone stand and a pop filter (you can also make one yourself with wire and a piece of tights from your wife / girlfriend / mother / daughter / neighbor). The stand will prevent you from manually holding your microphone and thus produce handling noises. As for the pop filter, it prevents the air to hit the microphone and produce unwanted blowing sounds when you pronounce some letters such as "p" or "b".
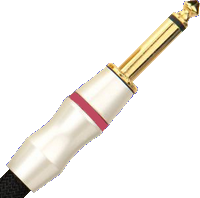
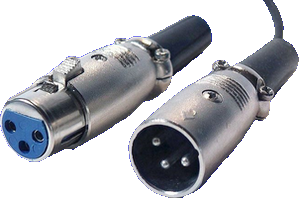
Jack plug (left) and XLR (right)


No need to go on and on forever, recording is rather easy. As long as you pay attention to your recording levels and take care over your takes, you should get a satisfying result, good enough to finalize the song

Messages page # 1 2 3 4 5 6 7 8 9 10 11 12 13 14 15 16 17 18 19 20 21 22 23 24 25 26 27 28 29 30 31 32 33 34 35

FromMe
le 13/10/2025 à 12h14
Hello.
So how can I contact LePou?
The latest X64 version of Legion has a bug where the Drive amount jumps when changing from green/red channels. The knob doesn't jump, but you can hear the drive amount jump when tweaking a little bit, so who knows what the default or chosen sound is being used whenever?
Also similar problems with the Engl as well. The old V 1.01 x86 32 bit version of Legion works perfectly however. (but the newer 64 bit version does sound a bit better, sadly).
Has you or anyone else noticed this?
I want to contact him for a way to fix these plugin bugs.
* * * * * * * * * * * * * * * *
Hello,
To my knowledge, Lepou has not been active for years in the simulation community. I think he has completely given up by lack of time and motivation. So I doubt he'll be willing to fix any bugs, and I have no idea how to contact him.
Grebz

musicien-bidouilleur
le 07/09/2025 à 17h58
Juste pour t'encourager et te féliciter pour ton travail. Bonne source d'informations.
J'ai écouté en partie ta musique : il y a un monde entre 2008 et 2020, non pas concernant les titres que j'aime bien mais concernant leur réalisation. 2020 >>> 2008 à mon humble avis.
Le travail et la persévérance paient !
Bravo.
* * * * * * * * * * * * * * * *
Merci beaucoup, ça me fait très plaisir !
Grebz

ace0fspades
le 25/08/2025 à 05h50
Thanks for the free impulses! Great stuff!
* * * * * * * * * * * * * * * *
Thanks for visiting!
Grebz

Jimmy
le 09/12/2021 à 15h16
Hello,
I would like to config my Schuffham S-Gear 2 but I don't know how to do.
I have Logic Pro X.6.2 with S-Gear plugin
I found your website and I ask myself what does it means in the folder Schuffham S-Gear 2.
I don't understand what you have writing like in this exemple : Guitar on the left:
1 impulse of baffle Marshall 1960A (loudspeaker: G12M) through a microphone Neumann U67 in Cap Edge position, at a distance of 2 inches (5 cm). Stereo panning: 100% left.
1 impulse of baffle Marshall 1960A (loudspeaker: G12M) through a microphone Neumann U87 in Cap Edge position, at a distance of 4 inches (10 cm). Stereo panning: 100% left.
How can I find the same sound as you ? How can I do to config my own S-Gear with these parameters ? What does it means ?
Sorry for my English ;) I’m French !
You can answer me directly on my email address.
Thanks in advance.
Jimmy

Labrava
le 29/10/2021 à 13h49
Hi Grebz,
I don't know if you read these... but I was wondering if your Lepou plugins are x32 or x64? Thanks for all the great stuff on here!
* * * * * * * * * * * * * * * *
Hello, thanks for visiting my website. They're x64.
Grebz
